Image resizing tool
Please note: these tools are still under development in beta testing and are temporarily hosted at these URLs. They will be re-located at a later date.
Two image re-sizing tools have been created to help you add images of suitable size to the website:
- http://sappstu02.ad.hud.ac.uk/photosizer - for general images.
- http://sappstu02.ad.hud.ac.uk/photosizer/rhc.php - for the right hand column content blocks.
You can also download a pdf of the guidelines: Image resizing user guide
General Image re-sizer
1. Follow this link http://sappstu02.ad.hud.ac.uk/photosizer
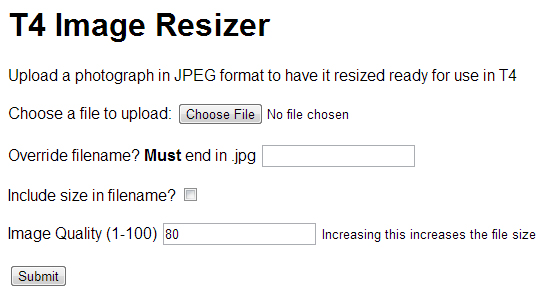
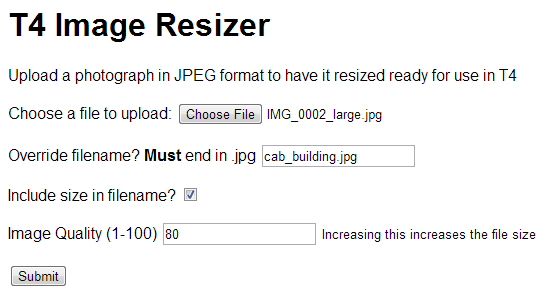
2. Click “browse” and navigate to the folder where the image is (the one that you want to re-size). Please note that the image must be a JPEG.
3. If you want to re-name the image, type the new name in the “Override filename” box. Please note that the filename has to end in .jpg – for example “creative_arts_building.jpg”
4. Tick “include size in filename” – this will make it easier for you to identify the different sized images at the end.
For the web, we recommend an image quality of between 65 and 80. You can leave the image quality at the default value of 80 if you want. A high quality image means an increase in file size. Increased file size for images will increase the time it takes for a webpage to load.
5. Click “Submit”
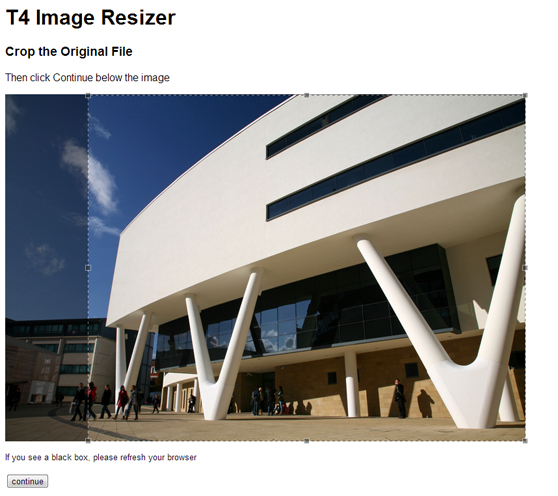
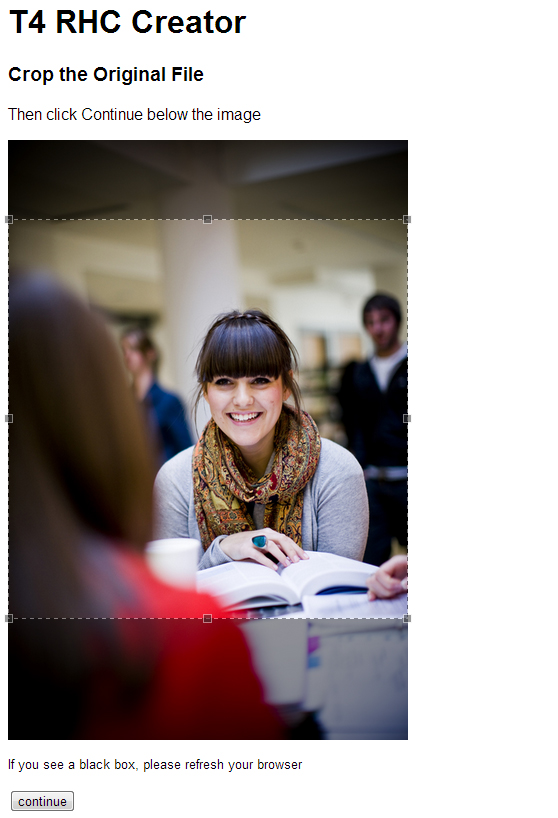
6. Once you have clicked “submit”, you will see a copy of your image and have the option to crop it. If you don’t want to crop the image, click “continue”. To crop the image, click and drag a box around the part of the image that you wish to keep. Any part of the image outside of the box will be deleted. In the screenshot below, everything in the strip on the left will be deleted (you can see that the image looks darker to the left of the box). Then click “continue”.
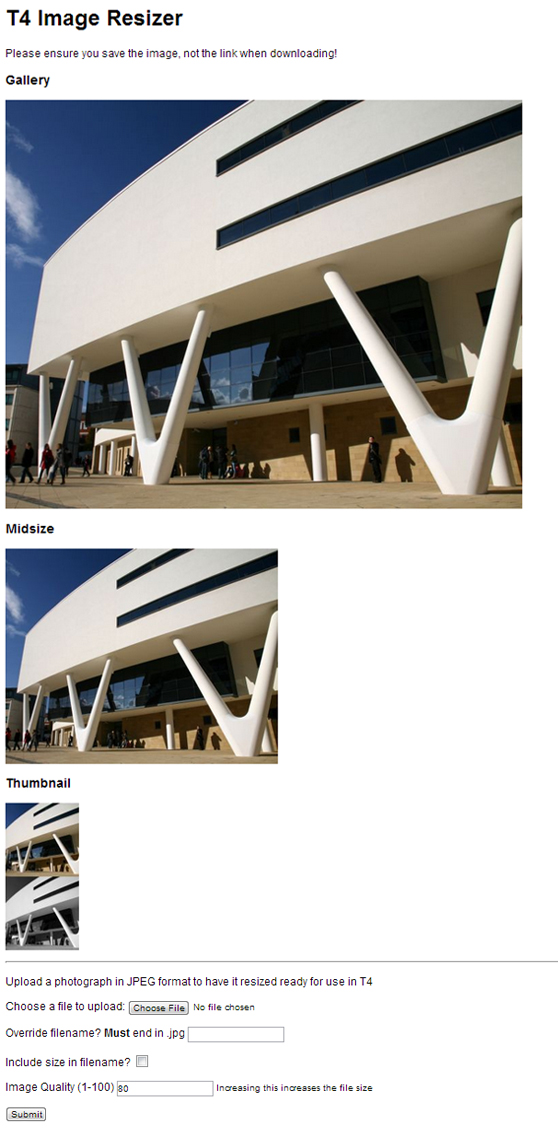
The image re-sizer tool will now crop the image and provide you with three sizes of the image – gallery (742px x 600px), midsize (400 x 323) and thumbnail (108px x 108px which will turn grey when rolled over with a mouse). The following screenshot shows the images loading.
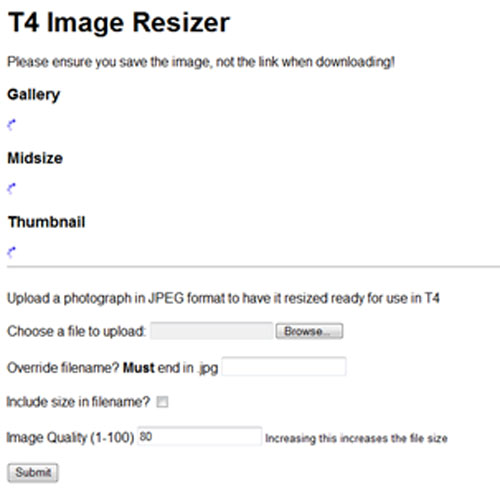
The images have now finished loading and are displayed.
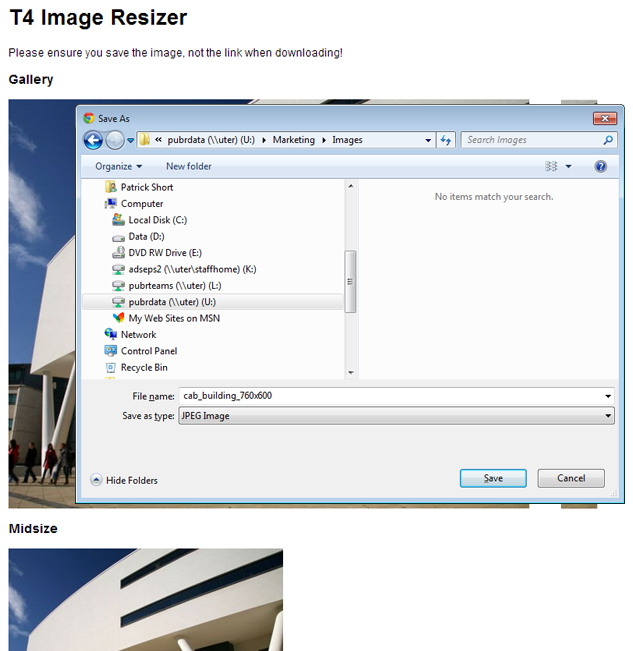
7. To save the images, you must right-click on each image and select “save picture as”.
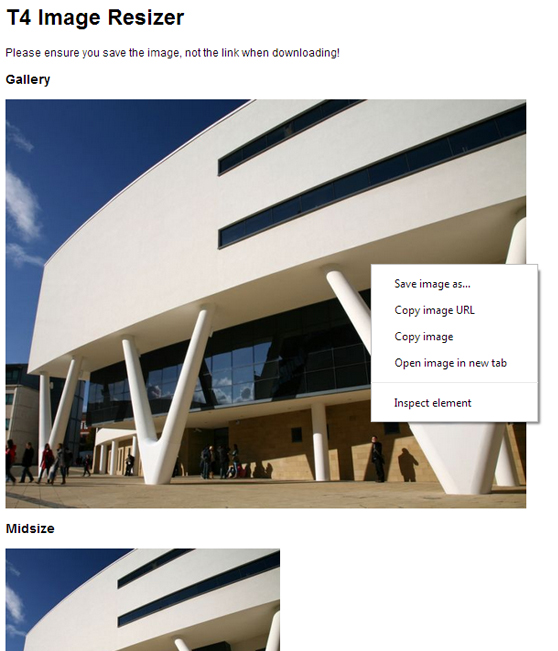
If you ticked the box on the first webpage to include the size in the filename, then the filename should be automatically set. You just need to browse for the folder where you would like to save the image to and click “Save”.
8. Now you just need to add the images to the media library and will then be able to include them on your web pages. Please remember that:
- Gallery images are for the large image for image galleries
- Midsize images can be used on web-pages
- Thumbnail images are the smallest content blocks (useful for thumbnails for image galleries, news stories etc.).
9. You can now start again and re-size a new image by scrolling to the bottom of the page, browsing for the image that you want to re-size and repeating the steps all over again.
Right hand content block image re-sizer
1. Follow this link http://sappstu02.ad.hud.ac.uk/photosizer/rhc.php
This tool is very similar to the general image re-sizing tool.
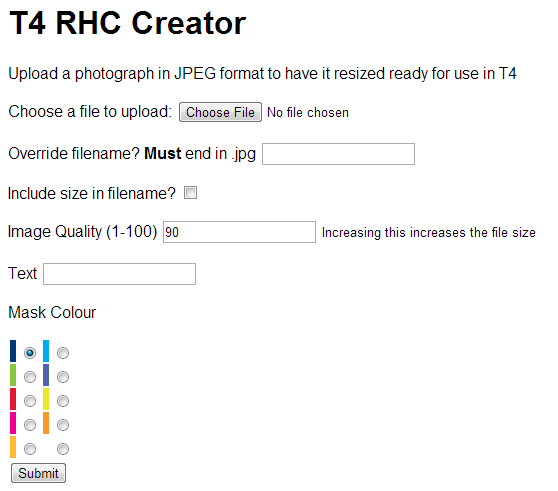
2. Click “browse” and locate the image that you would like to use in the right-hand column (please note that it must be a JPEG).
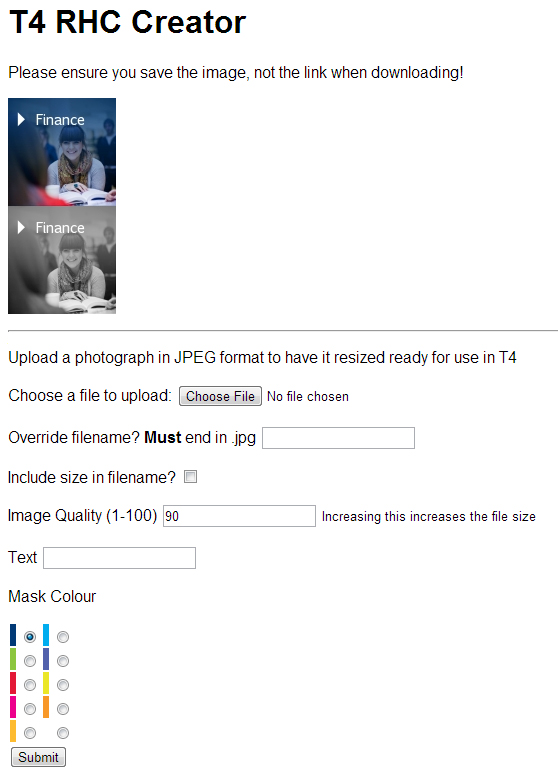
3. If you wish to re-name the image – type the new filename in the “override filename” box and make sure you end the filename with .jpg. For example, “finance.jpg”
4. Tick the box that states “Include size in filename”
5. Specify an image quality of 65
6. Type the text that you would like to appear on the right hand column content block, in the “text” box. We would recommend that the text be no more than 4 words.
7. Choose a branding colour to be overlayed as a tint over the image or choose the no colour option (last option on the right)
8. Click “submit”
9. Now you have the option of cropping the image. Click and drag to draw a box around the image to select the part of the image that you want – everything within the box will be kept, anything outside of the box will be deleted. The crop box is square because the final image will be a small square box (108px x 108px) with a greyed out version underneath which will appear when the image is hovered over.
10. Click “continue” when you are happy with your selection. The image will now be re-sized and turned into a right-hand content block, perfect for a right-hand column.
11. Right-click on the image and click “Save picture as” and save it to your folder.
12. Now all you need to do is add it to the media library and then you can use this content block in a right-hand column.
13. You can repeat the process to create another right hand column content block, by clicking “Browse”, navigating to the image that you would like to use and repeating the steps outlined above.