Child links
Child links are an additional navigation tool that can be added to any webpage. They are extremely useful to have on the main landing page to a section and enable you to show all the pages relevant to that section in one place.
Child links can perform the same role as the left-hand navigation, however they are specific to a certain section and can help with usability for that section. It is good practice as it saves adding links manually and will update automatically if the link url changes.
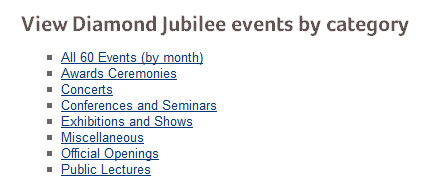
This is an example of a child link menu (with a heading). Each of the bullet points are a separate sub-section (or child link).
This is an example of a child link menu without a heading. Again, each of the bullet points are a separate sub-section (or child link). You can see the four child links at the bottom of the webpage.

Creating a child link menu
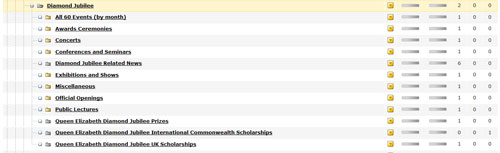
To create a child link section, you will firstly need to ensure that all the sub-sections that you would like to appear in the child link section have yellow icons (indicates that this sub-section will be shown in navigation), and that all the others have grey icons (indicates that this sub-section will not be shown in navigation) in Site Structure view.
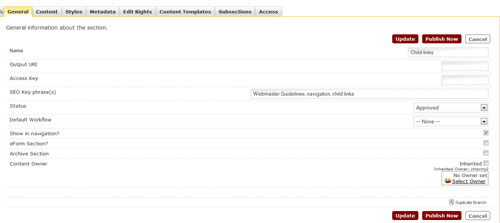
You can do this by clicking on each of the sub-sections and ticking/ unticking the "Show in navigation" box on the General tab for each section (webpage) that you would like to be displayed. You may also wish to double check the name of all of the sections that are to be displayed as child links. The child links have the same text as the name of the section. Please note that the only way to change the child link text is to change the name of the section on the General tab.
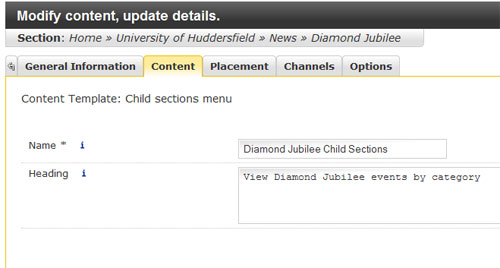
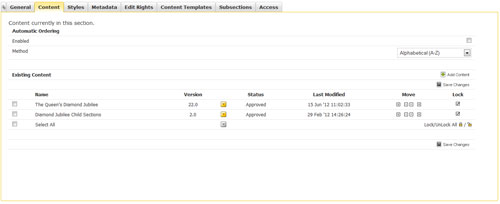
You will then simply need to go into the section (webpage) where you would like the child links menu to be displayed and click "Add Content" (under the Content tab). Select the "Child sections menu" template. You only need to enter a name (filename in T4) and may also want to add a heading (the heading is optional and if added, will appear on the webpage above the links - as in the first example above) and click "Add".
You will then be returned to the Content tab for the section. Use the arrows under "Move" to position the child link menu where you would like it on the page. If you would like it to appear at the bottom of the content (this is where we generally put child link menus), then make sure it is the last content item in the list. Once you are happy with the sequence, click "Save Changes". Please note that these changes will not be reflected on the live site until they have gone through the hourly render cycle.
In a couple of hours, the child link section should come through on the live website. If you need to change the text for any of the links, remember that you need to edit the name of the sub-section under the General tab in T4. This will change the name of the section in the breadcrumb trail and also the child links.
If you need to change the order of the child links, click on the top-level section (the section above your sub-sections) in Site Structure view. Click on the "Subsections" tab and use the arrows under "Move" to re-order the sub-sections. Once you are happy with the order, click "Save changes". As soon as these changes have been through an hourly render cycle, they should be reflected on the live website.